Internationalization (i18n)
Page summary:
Internationalization manages content in multiple locales directly from the admin panel. This documentation explains how to add locales, translate entries, and control locale-specific permissions.
The Internationalization feature allows to manage content in different languages, called "locales".
Configuration
Before being usable in the Content Manager, the Internationalization feature must be configured from Settings, and it should be enabled on your content types from the Content-type Builder.
Content-type Builder
Path to configure the feature: Content-type Builder
For your content types to be translatable with Internationalization in the Content Manager, the feature must be enabled through the Content-type Builder. Internationalization can be configured for each content type and/or field.
- Either edit the already created content type/field of your choice, or create a new content type/field.
- Go to the Advanced settings tab.
- Tick the option named "Internationalization" at content-type level, and "Enable localization for this field" at field level.
Settings
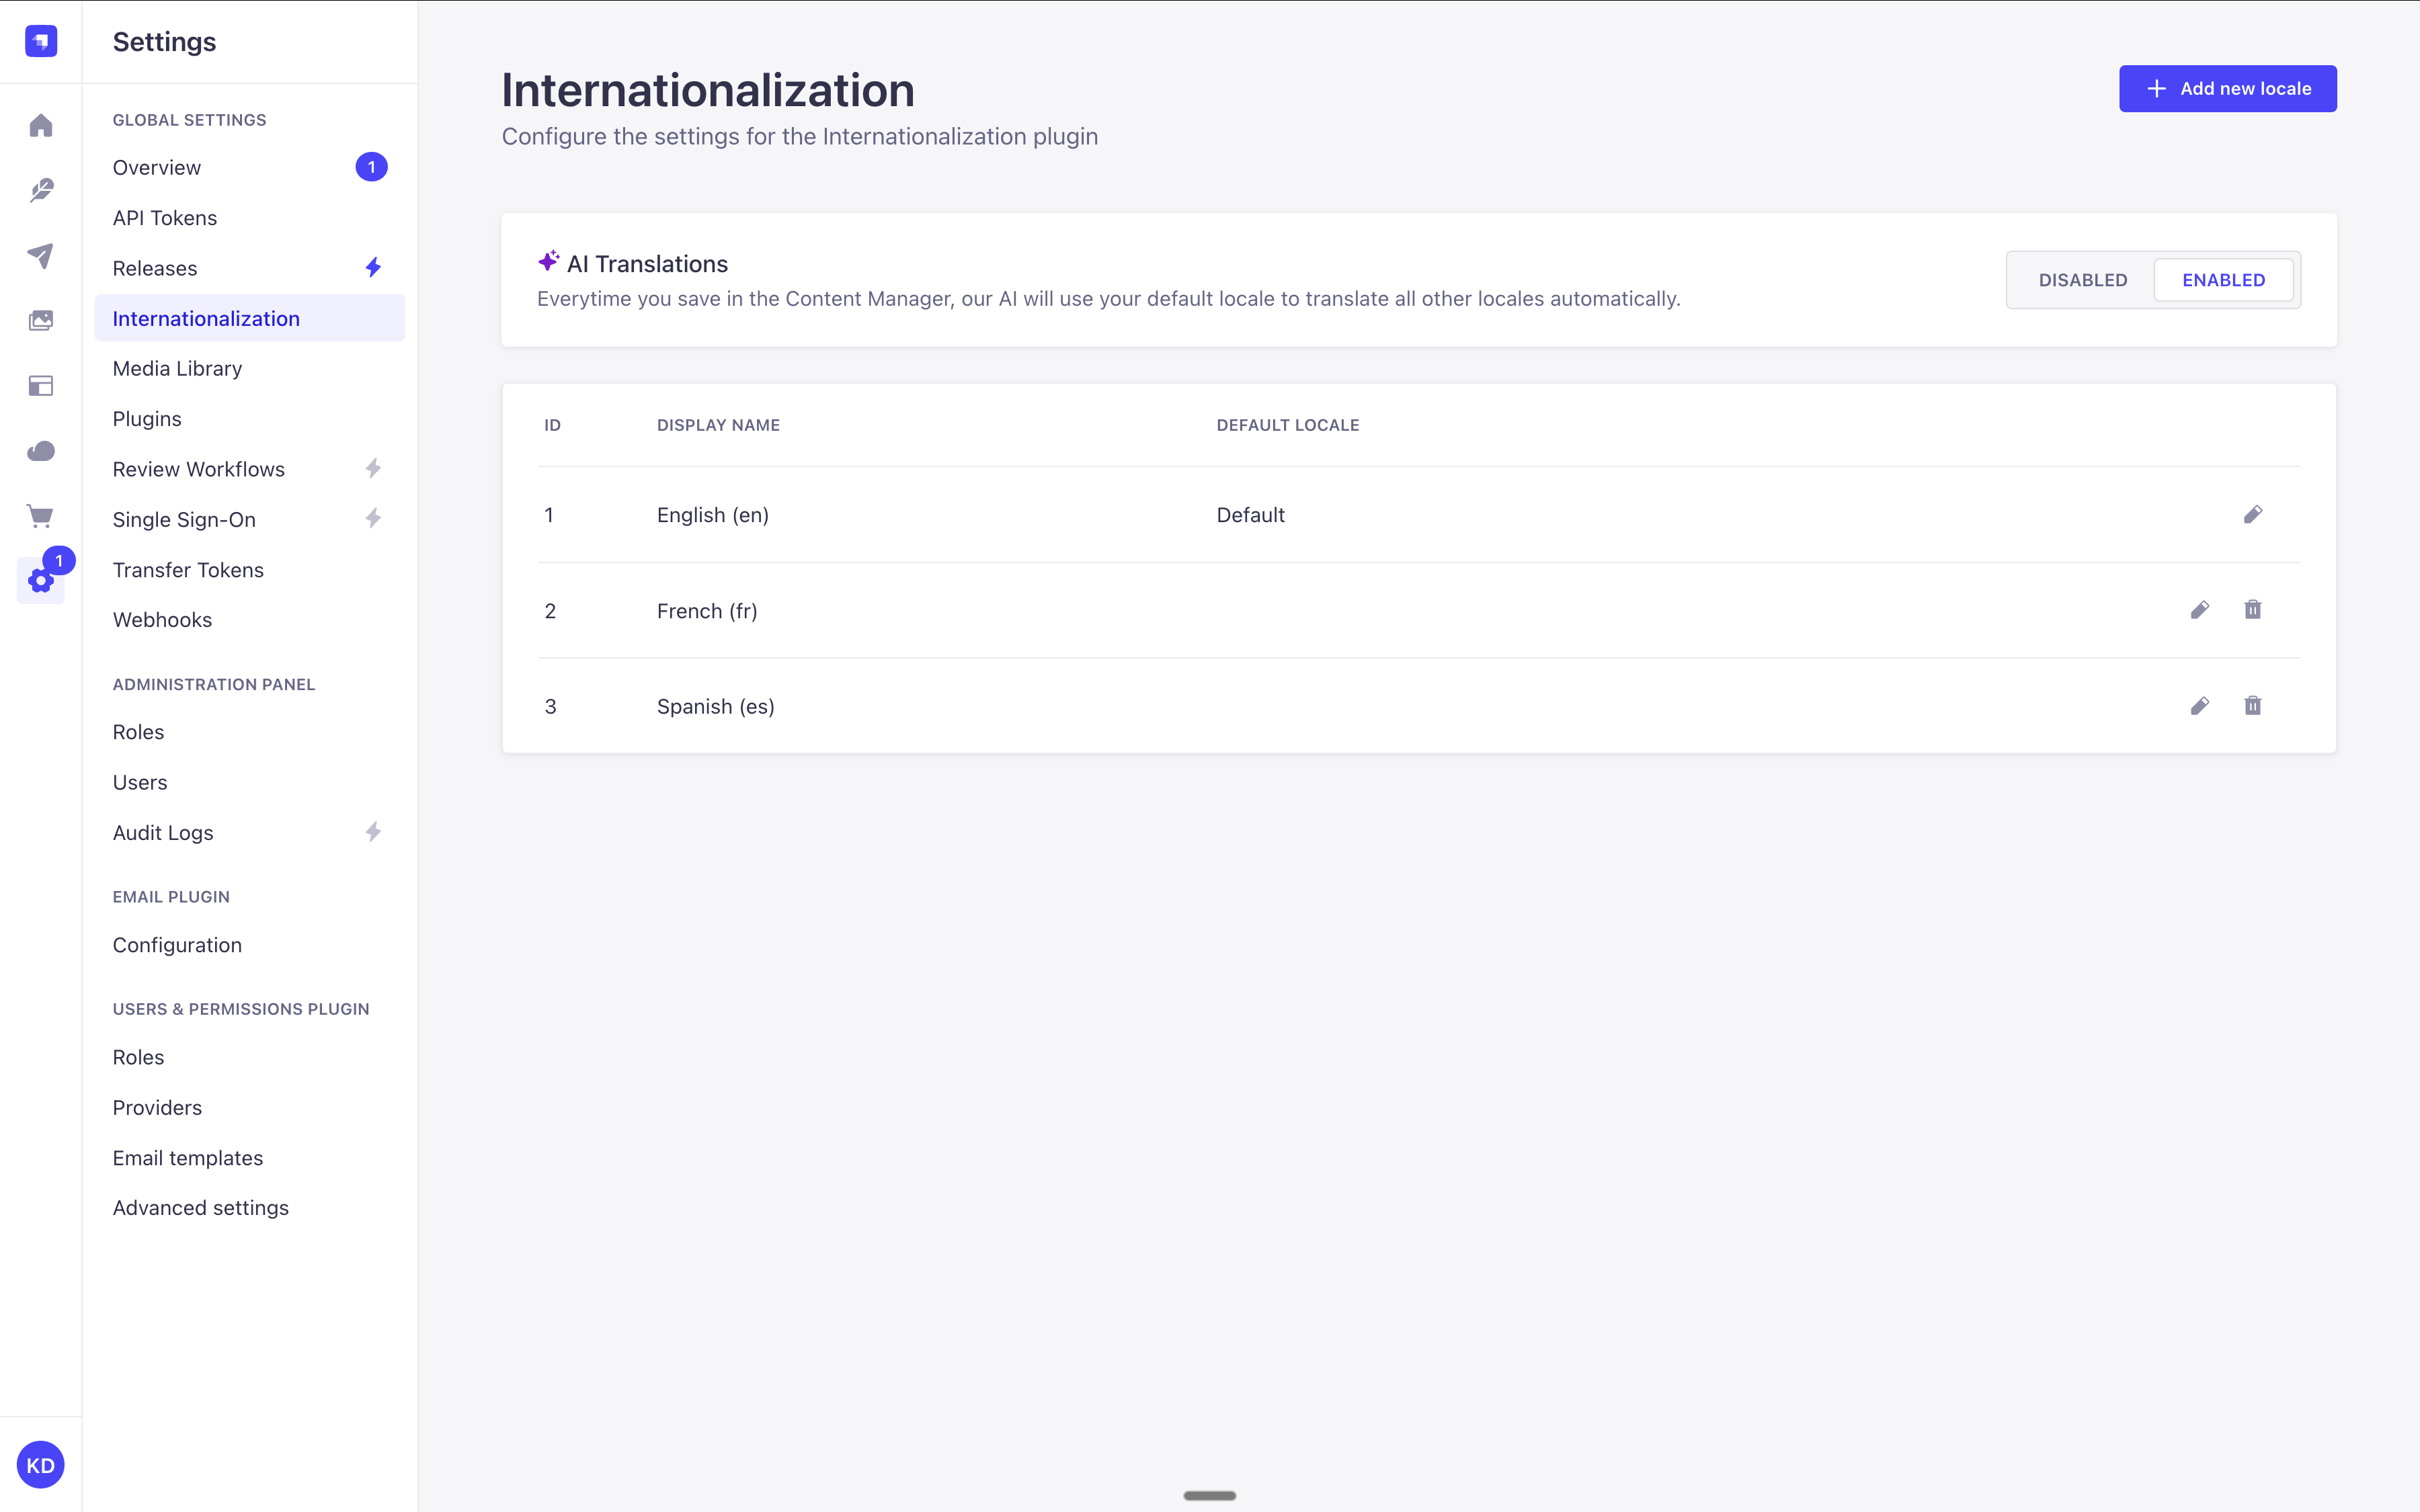
Path to configure the feature: Settings > Global Settings > Internationalization
The Internationalization interface displays a table listing all locales available for the Strapi application. By default, only the English locale is configured and set as the default locale.
For each locale, the table displays the default ISO code of the locale, its optional display name and indicates if the locale is set as the default one. From the table, administrators can also:
- Click on the edit button to edit a locale
- Click on the delete button to delete a locale
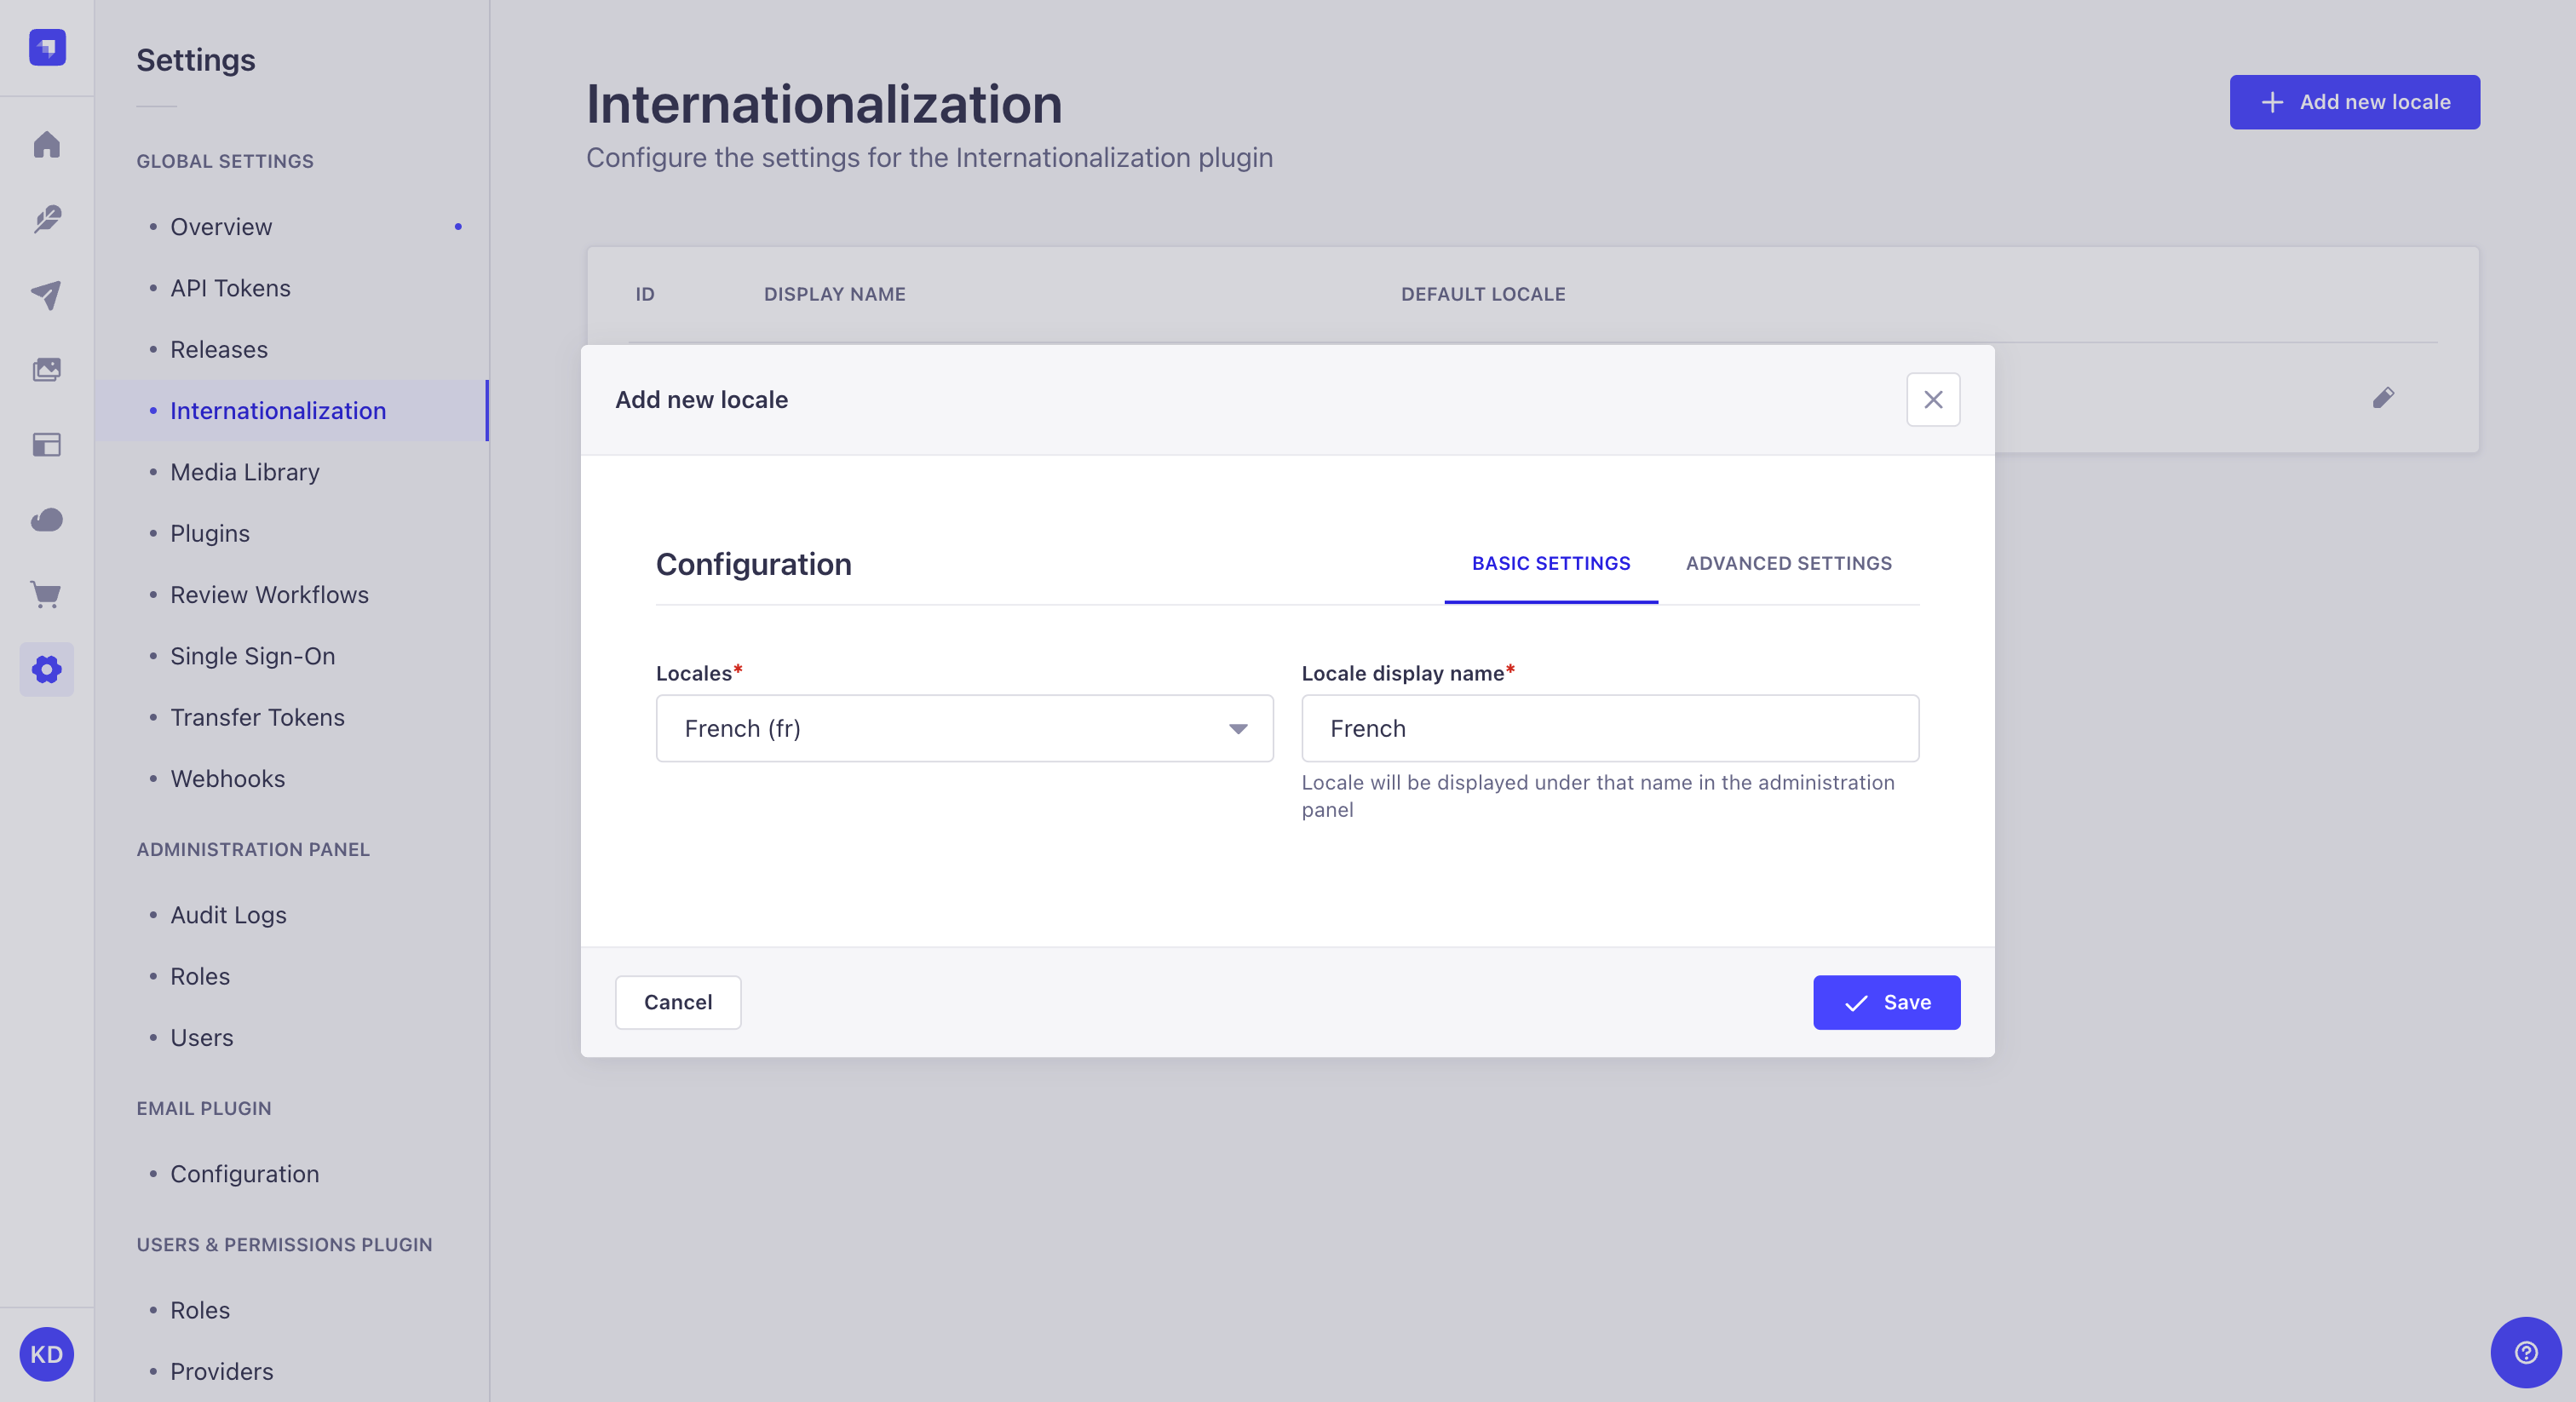
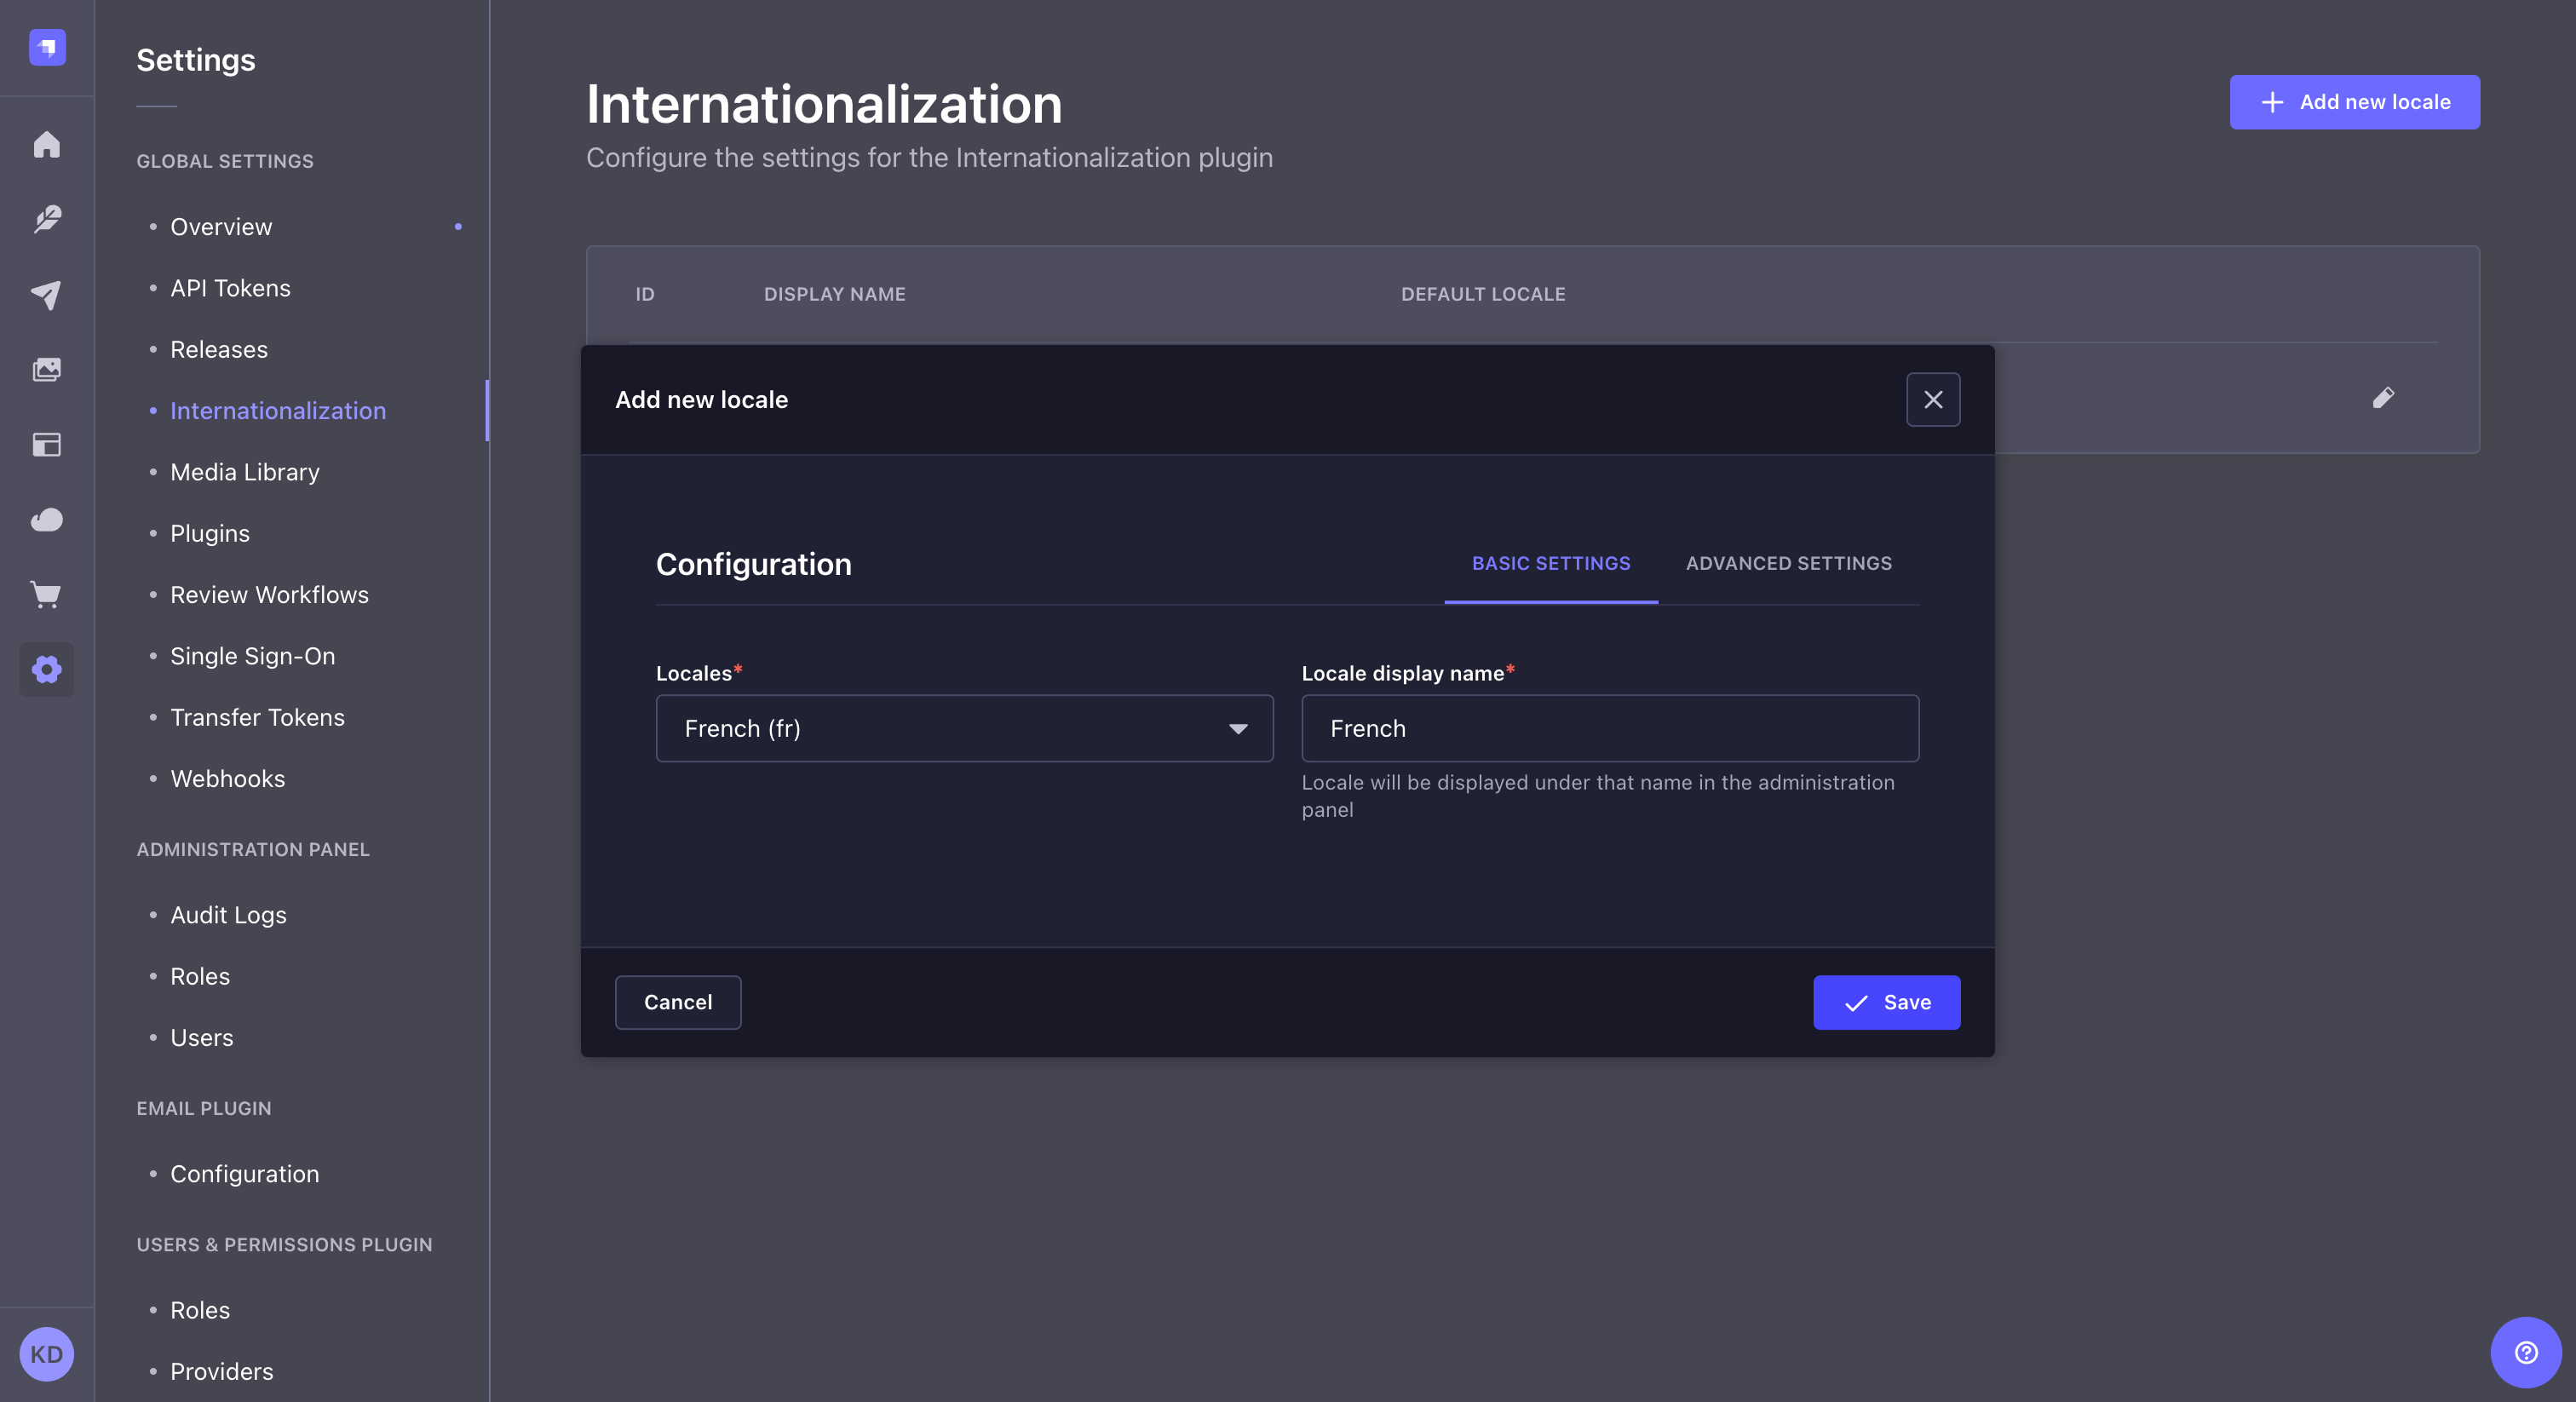
Adding a new locale
Administrators can add and manage as many locales as they want. There can however only be one locale set as the default one for the whole Strapi application.
It is not possible to create custom locales. Locales can only be created based on the 500+ pre-created list of locales set by Strapi.
- Click on the Add new locale button.
- In the locale addition window, choose your new locale among the Locales drop-down list. The latter lists alphabetically all locales, displayed as their ISO code, that can be added to your Strapi application.
- (optional) In the Locale display name textbox, write a new display name for your new locale.
- (optional) In the Advanced settings tab, tick the Set as default locale setting to make your new locale the default one for your Strapi application.
- Click on the Save button to confirm the addition of your new locale.
Enabling AI-powered internationalization
GrowthThis feature is available with a Growth plan.AI-Powered Internationalization enables automatic translations for all the locales in a project when the content in the default locale is updated. This enables content editors to have their content translated into multiple languages within a few seconds.
AI-powered Internationalization is disabled by default. To enable it, go to Settings > Global Settings > Internationalization and set AI Translations to Enabled.
Code-based configuration
A STRAPI_PLUGIN_I18N_INIT_LOCALE_CODE environment variable can be configured to set the default locale for your environment. The value used for this variable should be an ISO country code from the 500+ pre-created list of locales.
Usage
Path to use the feature: Content Manager, edit view of your content type
In the Content Manager, when the Internationalization feature is enabled for the content-type, a locale drop-down list is added to the top right of the edit view and allows to switch locales.
The Internationalization feature also allows dynamic zones and components to differ from one locale to another. Depending on the locale, dynamic zones can indeed have different structures depending on the locale, and repeatable components can have different entries and be organized differently as well.
Content can only be managed one locale at the time. It is not possible to edit or publish content for several locales at the same time (e.g. Clicking on the Publish button will only publish the content for the locale you are currently working on).
To translate content in another locale:
- On the top right of the edit view, click on the locale drop-down list.
- Choose the locale in which you want to translate your content.
- Translate your content by filling up your content-type's fields.
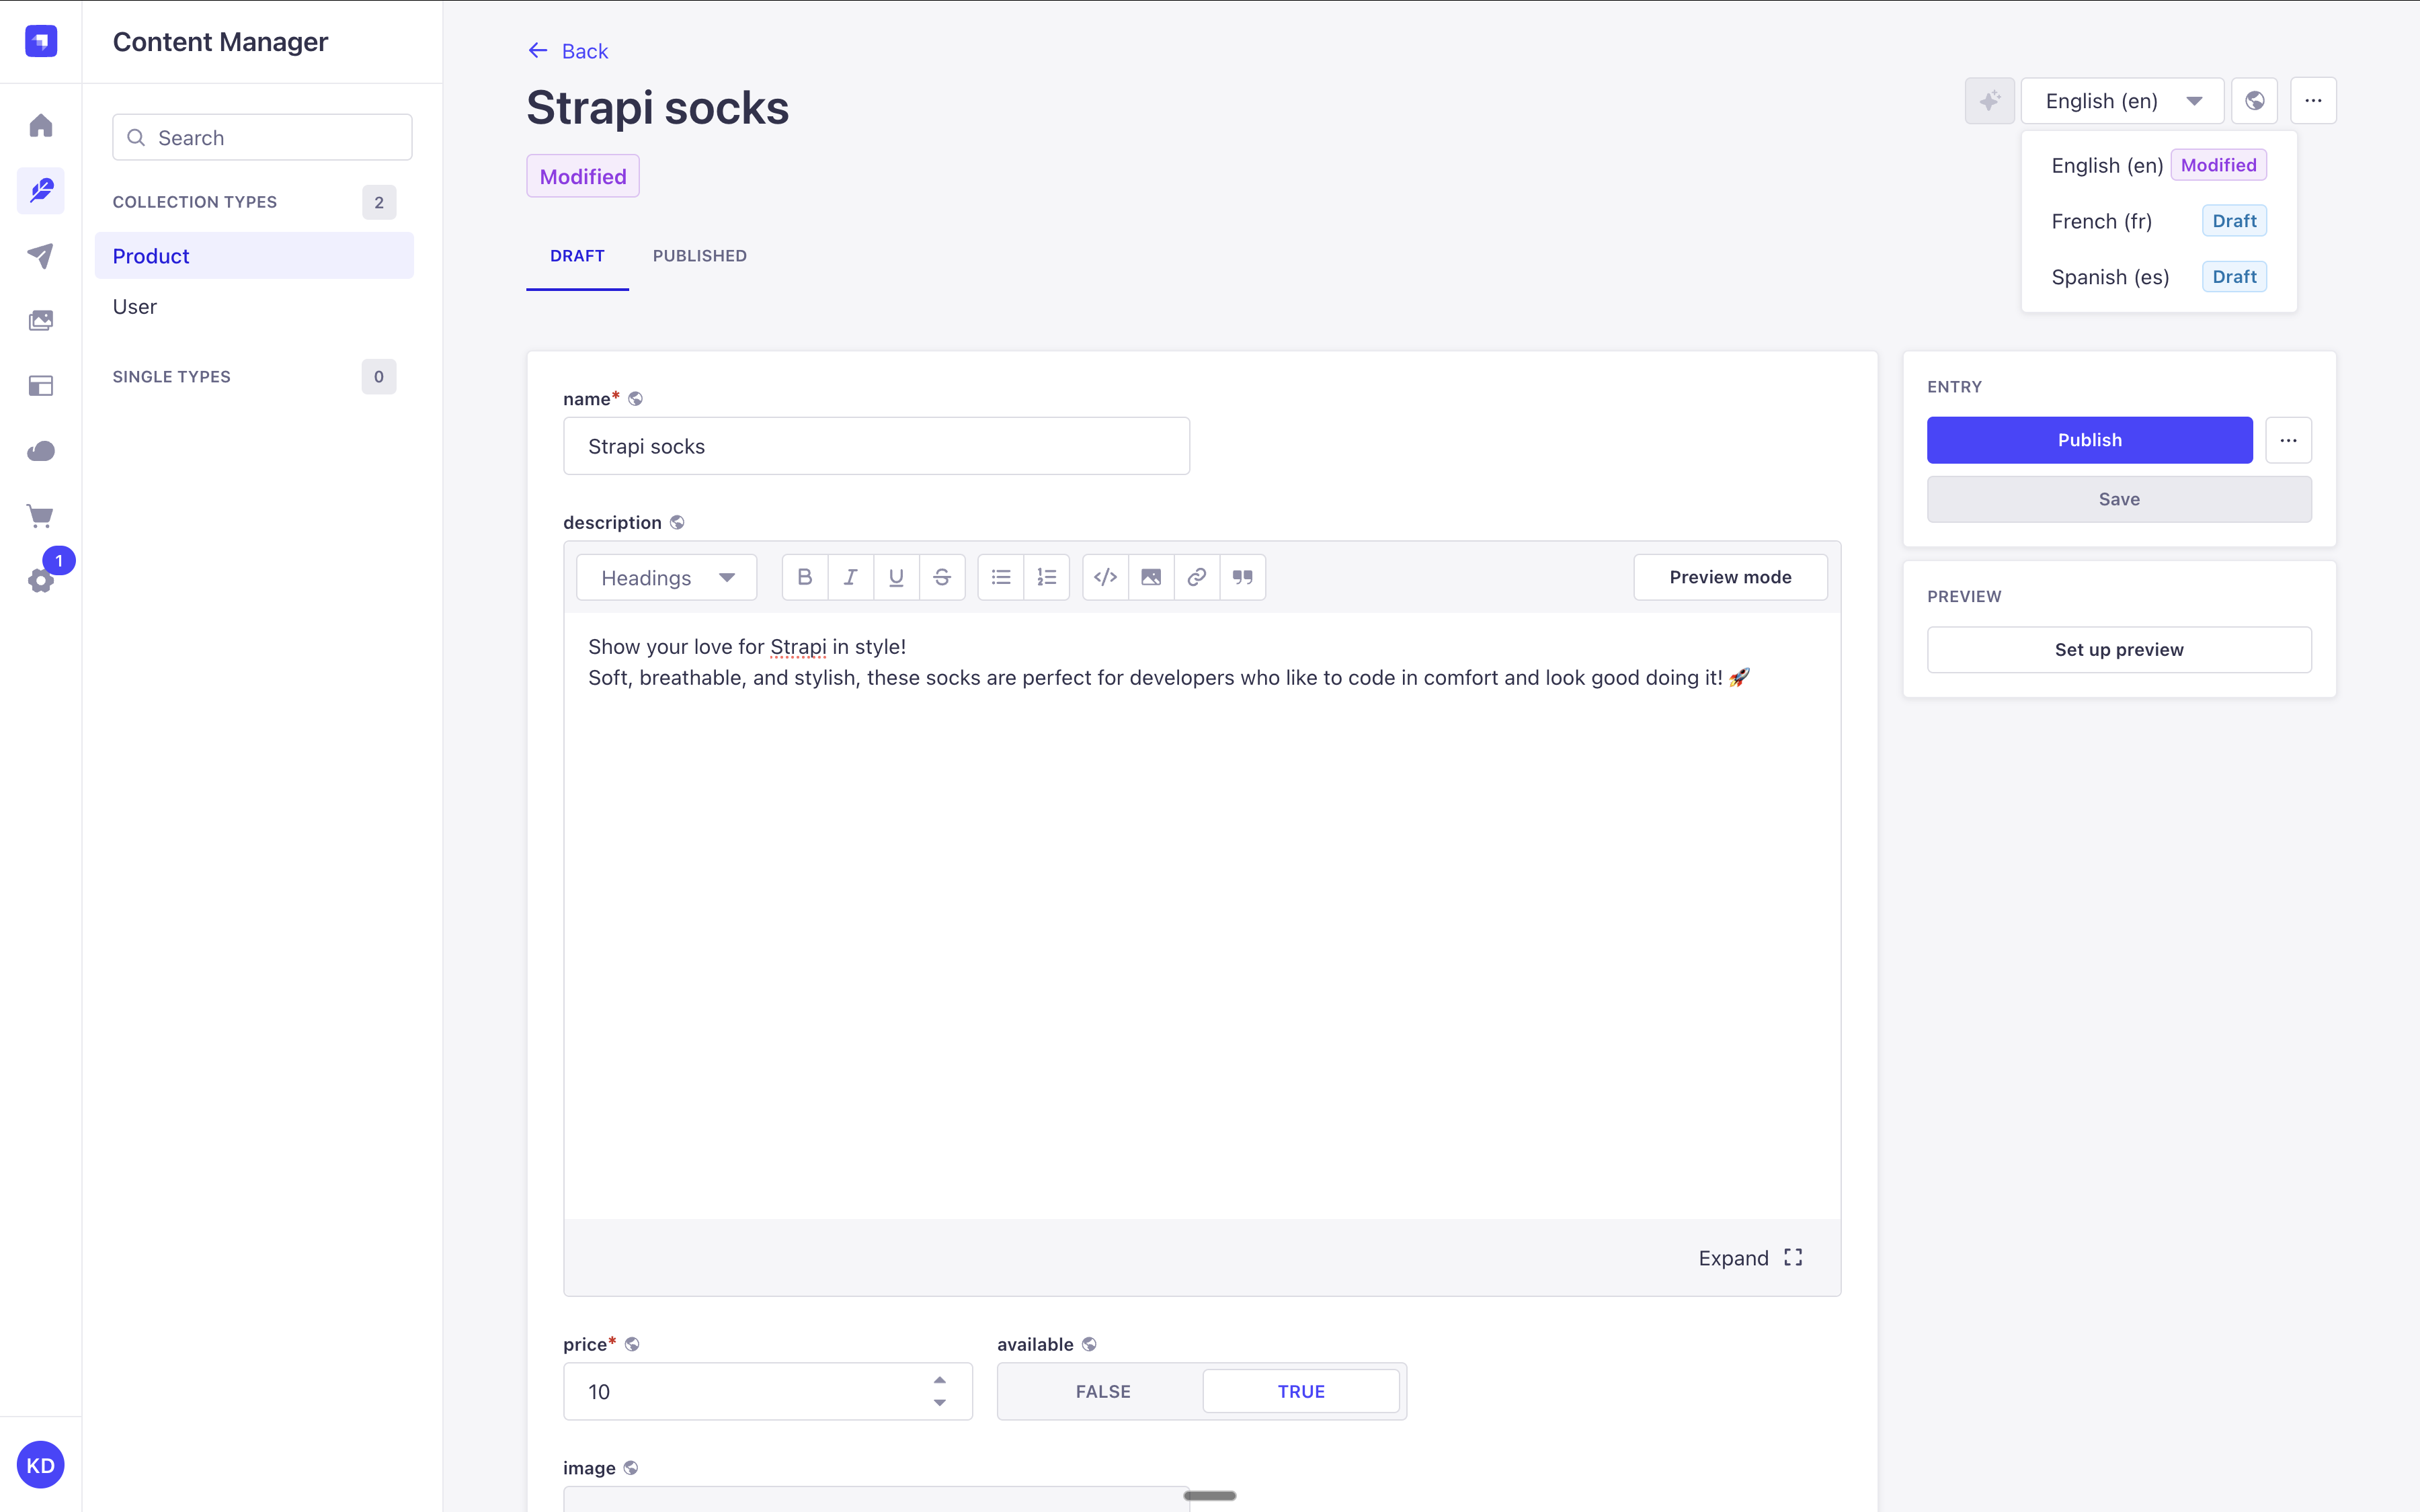
Click on the Fill in from another locale button, in the top right corner, for all non relational fields to be filled up with the values of another chosen locale. It can be useful if you do not remember what was the exact content in another locale. This button is not visible if you've enabled AI-powered internationalization since translations are automatically handled by Strapi AI.
AI-powered internationalization NewThis content is new.
GrowthThis feature is available with a Growth plan.When enabled, AI-powered internationalization enables automatic translations for all the locales in a project when the source content is updated. This enables content editors to have their content translated into multiple languages within a few seconds. The idea behind the feature is to ensure users only manually fill in content in the default locale, and Strapi AI translates it for all other existing locales.
Once enabled, whenever you edit a content-type in the default locale and click Save, all other locales for the content-type should be translated automatically, which will be confirmed by an All locales have been translated notification. Using this feature consumes Strapi AI credits.
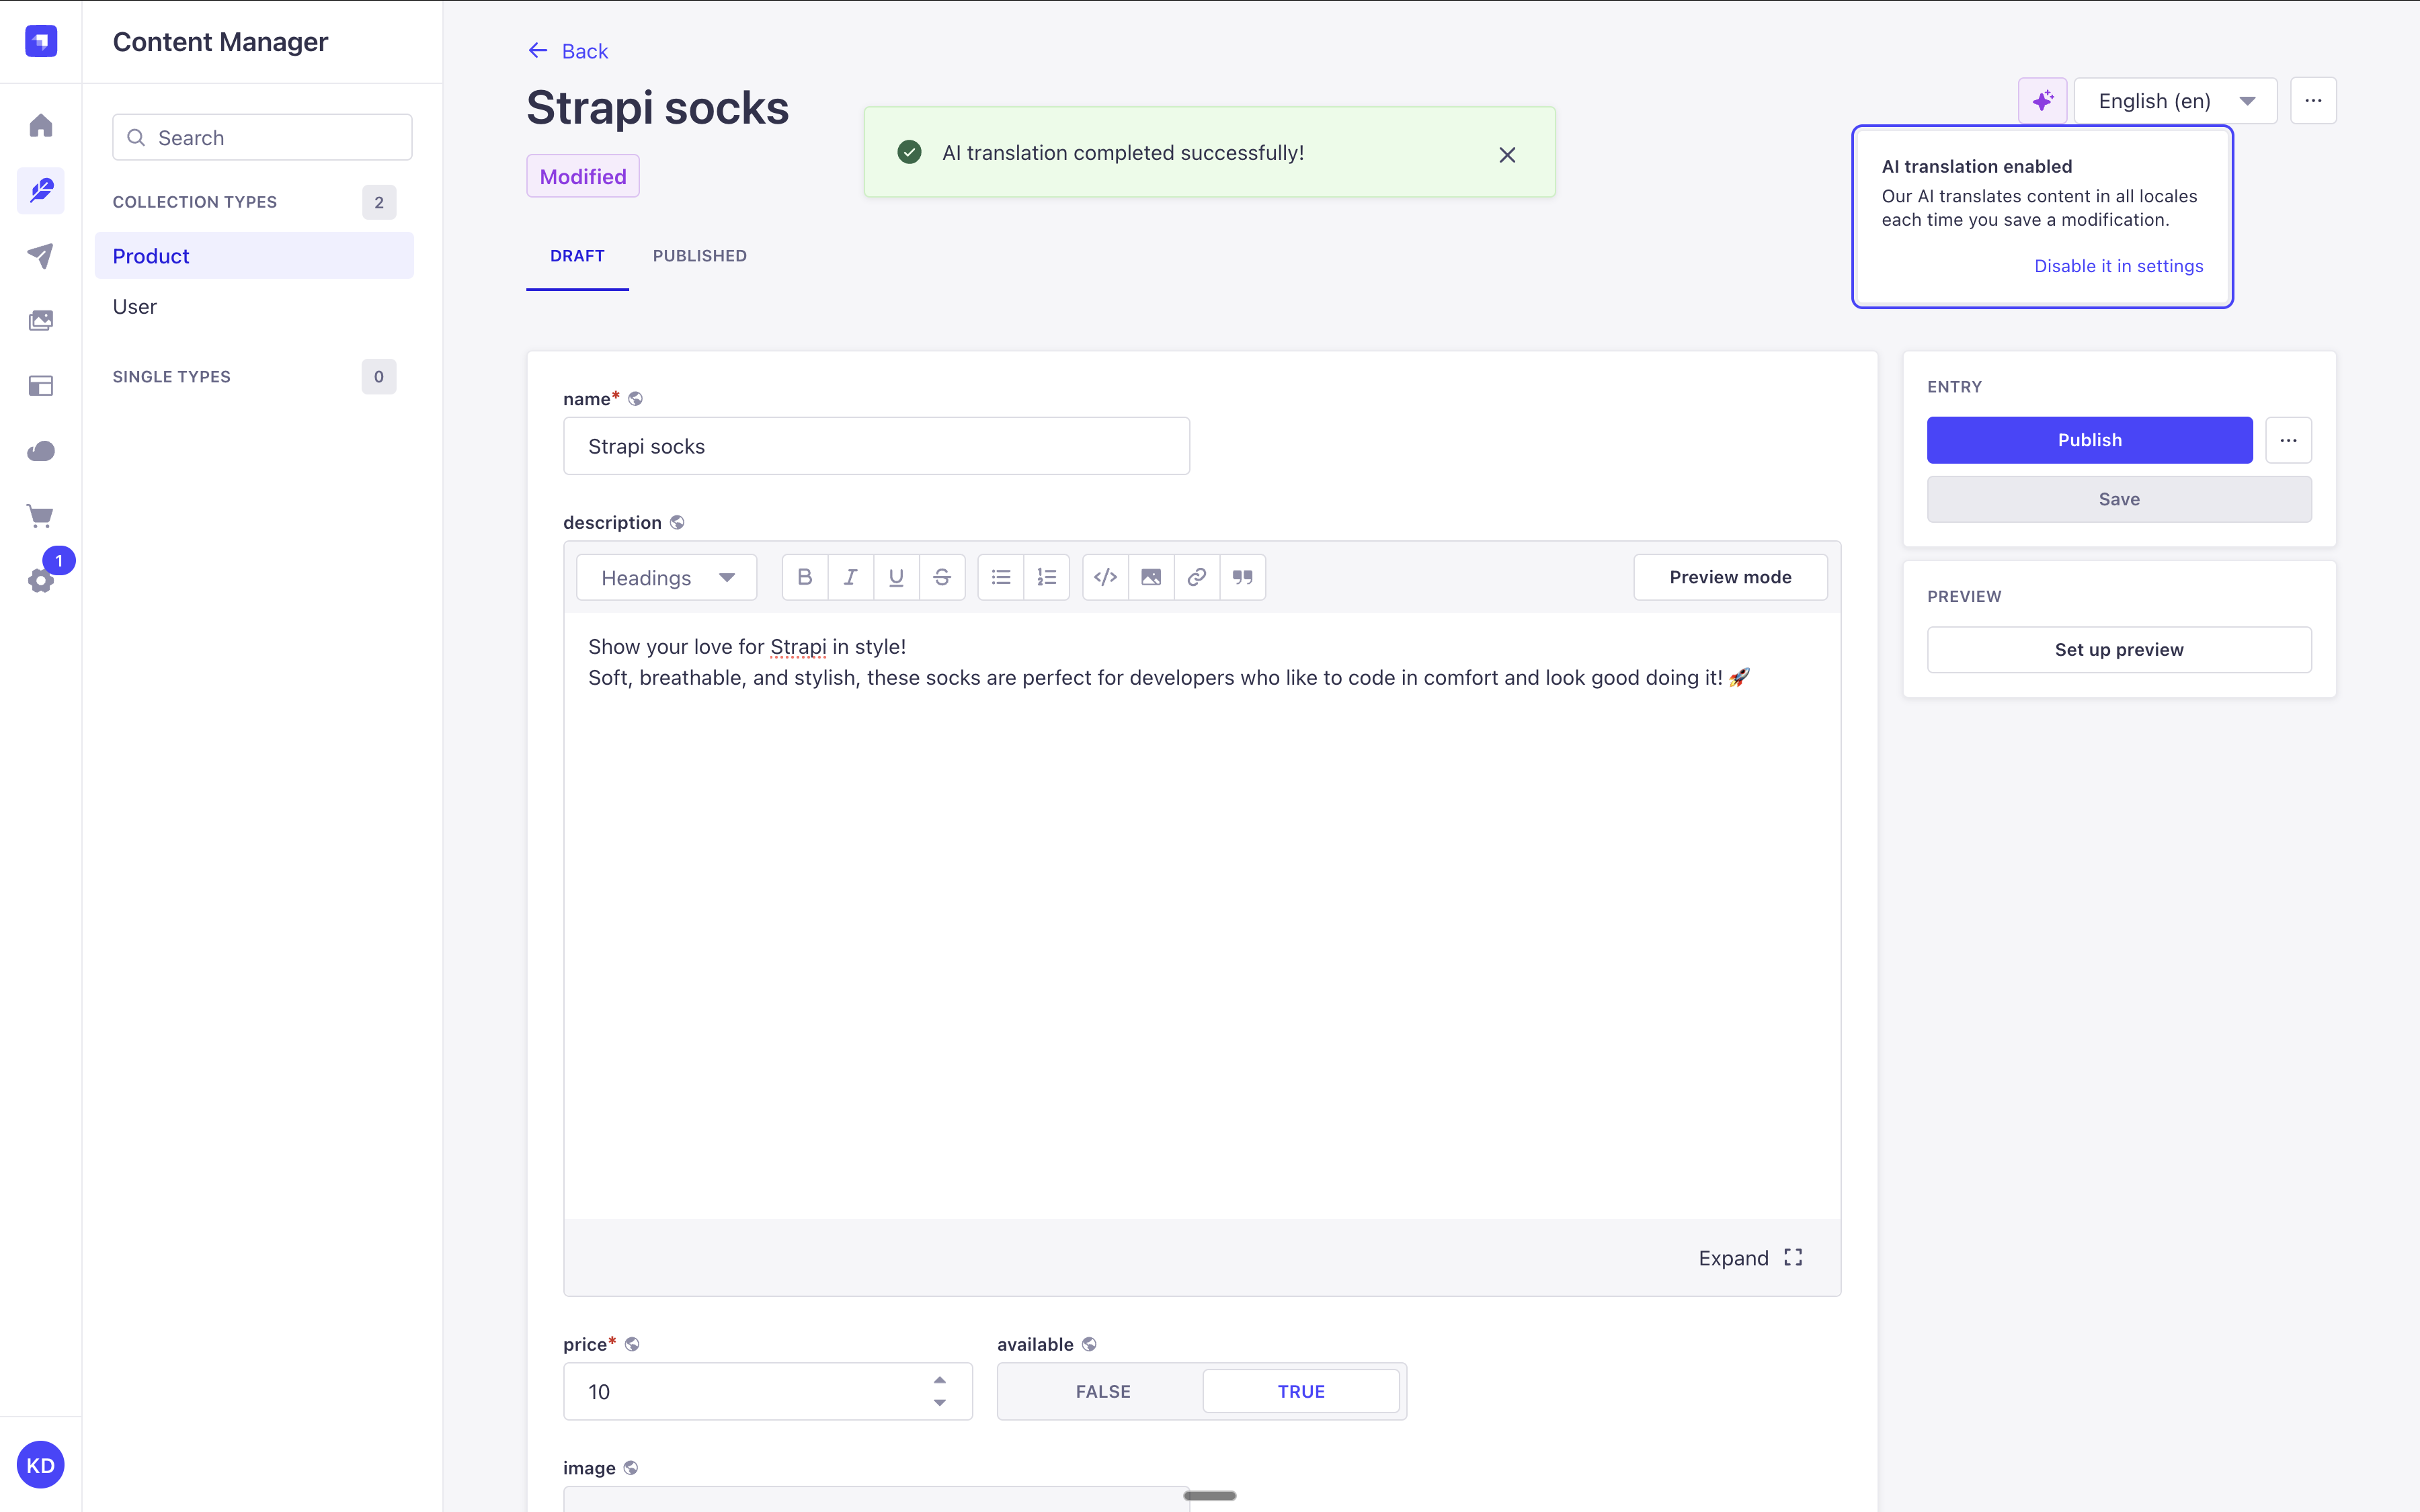
AI-powered internationalization only works one way, keeping the default locale content as the unique source of truth. Consequently, once the feature is enabled:
- Editing and saving content for any locale othen than the default one will not trigger automatic translations.
- When editing the content for the default locale, the manual modifications made to other locales will be overwritten.
Strapi AI includes 1,000 credits per month on the Growth plan, and 10 free credits during the free trial. Lightweight actions use fewer credits, while more complex ones use more.
You can check your credit usage in the Settings Overview of the admin panel. Notifications are sent when your usage reaches 80%, 90%, and 100% of your monthly allowance.
When your credits run out on the Growth plan, you can keep using Strapi AI, with overages billed monthly.
Usage with APIs
Localized content can be requested, created, updated, and deleted for a given locale through the various front-end APIs accessible from Strapi's Content API:
REST API
Learn how to use the locale parameter with the REST API.
GraphQL API
Learn how to use the locale parameter with GraphQL API.
On the back-end server of Strapi, the Document Service API can also be used to interact with localized content: